Home Contact Stained Wood Hospital Finish


  A major issue in repair and restoration of many instruments, is often the stain. Old Italian mandolins, as a rule, tend not to be stained, though I have come across some stained and finished tops on later instruments. German instruments are much more likely to be stained. There are various different types of stain that could be used, actually onto the wood, or in the finish. Again, this is a chemically complex area. Below I have tried to summarise the most useful elements in repairing instruments.


Some terminology:

Staining; the colouring of wood with pigment or dye. There are many types, which react differently with different woods.

Pigment; very finely ground particles which lodges in the pores, scratches and defects of the wood. It is a suspension and is therefore opaque. When built up it hides the wood grain like paint. Also, it needs a binder to stick it to the wood, or once the 'solvent' evaporated, it would blow away like dust. Can be bought as powder.

Dye; is a solution and colours the wood by saturating the wood fibres with colour. They allow the natural grain of the wood to show through. They need no binder. Originally of plant origin, they are now mainly aniline (a petroleum derivitive) and have very good resistence to fading. Can be bought as powder.

Binders; are either oil, varnish, lacquer or water-based, which fix pigment to the wood. The binder does not affect the look, but does affect curing time.

Grain-raising; certain applications will raise the grain when applied, notably water-based applications.

Wash-coating; treating the wood to partly fill the pores before applying stain. It is used mainly to reduce splotching. A simple method is to apply a thin shellac mix (1/2lb cut). Once cured, lightly sand with 240 grit. Then apply colour. The thinner the coat, the less the pores are sealed.

Glazing; applying a colourant (almost always pigment) after the wood's pores have been completely sealed, before or between finishing coats.

Shadinbg/toning; applying stain in the finish itself. A combination of this and the above is used to create the 'sunburst' effect.

Solvent; will dissolve a cured finish, turning a solid into a liquid.

Thinner; will only thin a liquid, but not dissolve a cured finish.


    Problems:

  • It is difficult to match the colour exactly, the old may have faded for example.
  • It is difficult to know what kind of stain was used, and what kind of finish.
  • The binders and thinners in the colourant must be compatible with those in the original finish, and the touch-up finish.
  • It is very difficult for an occasional repairer to have a comprehensive range of colours available.
  • It is very difficult to achieve a smooth seamless finish when touching up a limited area.

    Tips:

  • for the best match, if the surrounding colour is transparent, use dyes.
  • for the best match, if the surrounding colour is opaque, use pigments.
  • shellac is the simplest binder for both.
  • don't  use a colour with the same binder, thinner or solvant as the finish you intend to employ. For example, an alcohol-based finish, will cause an alcohol-based stain to run.
  • if things go wrong, colour can be quickly removed with the appropriate solvent.
  • don't use premixed colours, you don't know enough about what's in them.
  • buy powdered colours, which you can mix and match yourself.

    Solutions; I have found the simplest solution to the complex maze of stain and finish matching and compatibility is as follows...

  • use shellac as a binder and as a pore sealant
  • for light damage, I touch up the colour with water-based aniline dyes, and finish with compatible Tru-oil varnish after sealing with shellac (Rubbing oil varnish)
  • for heavy damage, I find it easier to take back to bare wood, and re-stain from scratch. See full process below.


Water-based Aniline Dyes

There are a variety of different dye types, with different solvents, oil, water and alcohol. I tend to use water-based for the following reasons...

   The advantages of water-based are...

  • they are the most light-fast
  • they penetrate more deeply
  • no toxic fumes
  • non-flammable
  • they do not interfere with either shellac or tru-oil finishes which I use most commonly.

disadvantages are...

  • they are slow drying (overnight at least)
  • they do raise the wood grain.

    Some tips for using w/b analine dyes...

  • mix your own from powders
  • use the relevant solvent
  • use a glass or plastic container (dyes may react with metal)
  • un-mixed colours are not the same as when they are dissolved
  • water-based dissolve better in warm water
  • use distilled water to be on the safe side 
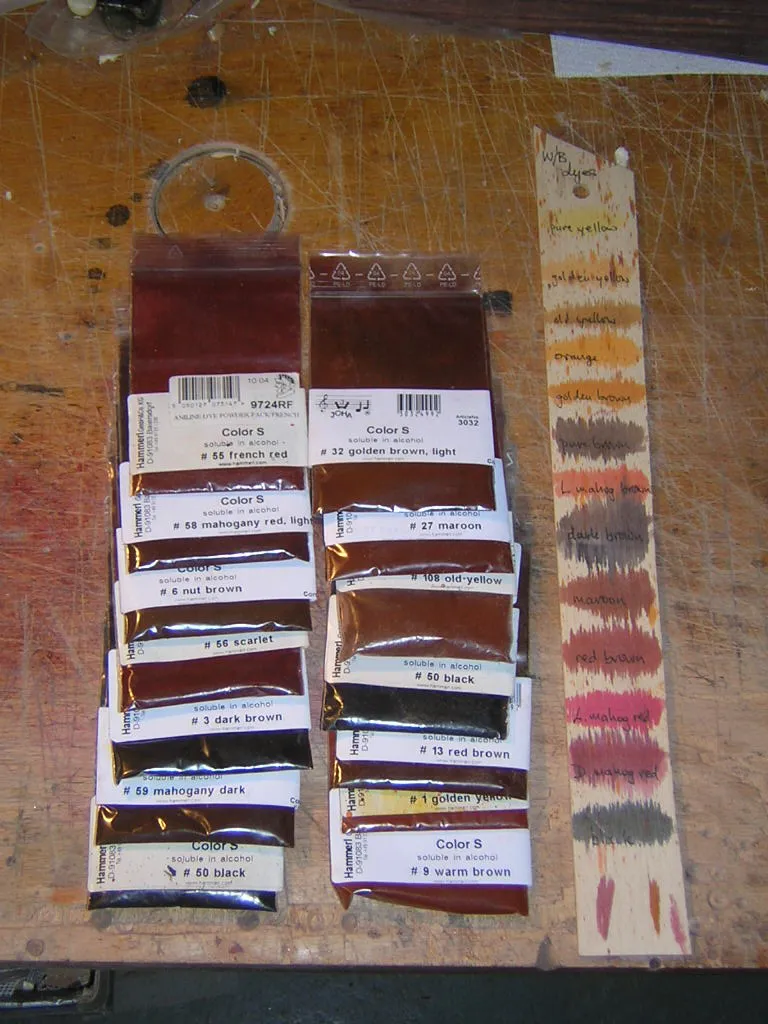
  • create a colour sampler to allow good comparisons.

   apply to the instrument as follows.......

  • test the colour on a wood sample of the same type as it is to be used on, wood colour will affect the way the stain will finally appear.
  • sponge the wood first to minimise grain raising
  • brush on repeated thin coats to build up the colour
  • or apply thickly and wipe off excess until happy with the intensity  (alcohol and oil-based are rarely 'wipe-off' as they dry too quickly)
  • re-applying waterbased dye dissolves the existing dye powder, making a higher dye-to-solvent ratio. Once dry again, the tone will be darker
  • because of the very fine nature of these powders, wear gloves and a mask.
  • light sand with 400+ sandpaper, and then buff with stiff net curtain material to 'shine' the wood before applying a finish.
   Right is a good selection of colours that covers those most often found on German instruments, plus my colour 'swatch'. Other tints may be created by mixing. It can also be seen that the powdered colour is NOT the same colour as when it is is mixed with water. Most of the powders appear brown.