| Simple Bridge | |||
| This bridge I call a simple bridge as it has the bridge and saddle all in one. It is easier to make than a shelf bridge, but cannot be used where a very low bridge height is needed. On the other hand it can be compensated.... Whilst making this bridge, I have assumed we are fitting immediately to the instrument. | |||
 |
Some extra tools are needed for this bridge, because the shelf was created largely with the chisel, whilst this one employs files much more. There is a half round file for the compensation, a round needle file, and a round file, diameter 5-6mm. | ||
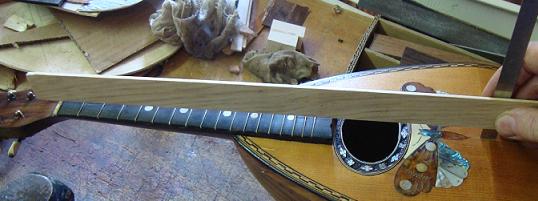 |
The first job is to estimate approx. bridge height with a straight edge and small ruler. Leave about 3mm above fret 12. | 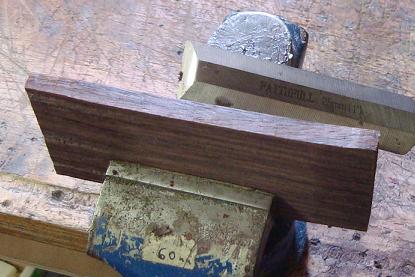 |
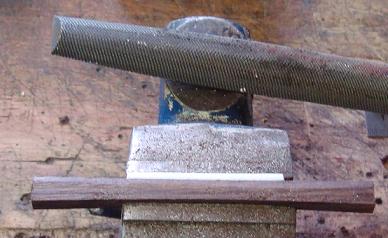
Then fit the foot. I have found a heavy file or rasp the easiest tools to fit a curve in the foot. Keep checking the fit, then file more, and check again...... |
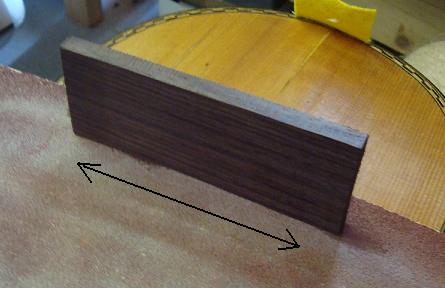 |
Once you feel it is a fairly close fit, hold some heavy sandpaper ( 80 grade) onto the top, and rub the bridge foot back and forth 2-3cms at the bridge position to fine-fit the foot. Again keep checking the fit..... | 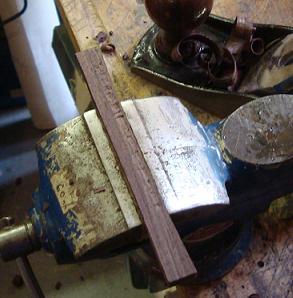 |
Next cut the bridge to size, leaving some height for the saddle (4mm is good). At this point I also check bridge width and sand down if necessary..... |
 |
 |
||
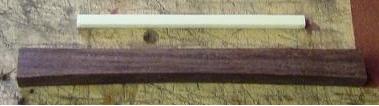
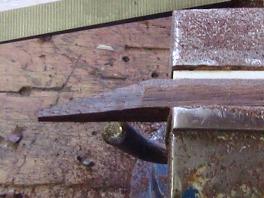
| Here the bridge is ready, the foot fitted, planed to appropriate thickness, and the bone saddle prepared. 55-60mm saddle is usually enough, assuming a string spread of 38-40mm. It should be about 4 x 4mm thick to allow some room for cutting and adjusting string height. | The saddle is glued to the bridge top. First mark the centre of the bridge, then mark half the saddle length either side of the first mark. The best glue to use is either superglue or titebond. | ||
 |
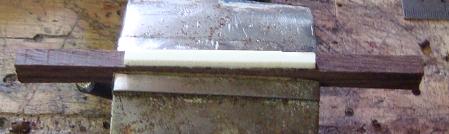
Once the saddle is glued, clamp in the vice, and taper the top with a heavy duty file, until the saddle and the bridge are flush. | 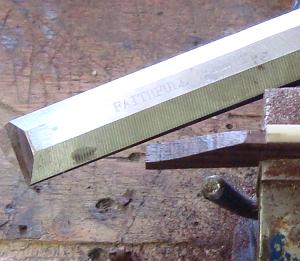 |
Using a chisel or rotary sander to taper down each end to begin forming the wings. |
 |
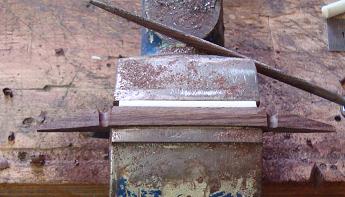
Turn sideways, and similarly taper the sides of the wings. | 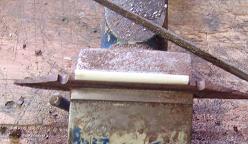 |
Cut a slot about 2mm deep at 5mm from each end of the saddle and using the 5mm round file, file each down to a depth of about 3-4mm |
 |
Turn sideways, and using the top groove as a guide, file grooves in the sides. To make the wings less fragile, you can leave the bottom of the groove wider than the top. | 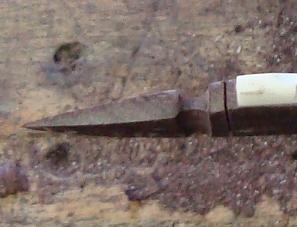 |
One or two decorative lines are then cut between the groove and the saddle. |
 |
|||
| Here is the
finished bridge, with string slots cut and compensation added. The
general compensation is as follows, but it will need to be adjusted for
each mandolin. The amount of compensation depends on string gauge,
string height at bridge and at fret 12, and string tension.
Typically, no compensation is normally added to string 1. String 2 is 1-2mm back. String 3 is 0-1mm back. String 4 is 3-4mm back. |
|||