|
Shelf Bridge Construction |
|
| Making any shelf bridge, whatever the exact design, follows more or less the same routine. If you have the mandolin to hand, fit the foot first, if not, leave a couple of mm for fitting later. Here I have assumed we do NOT have the mandolin to hand..... | |
 1.
1. |
|
|
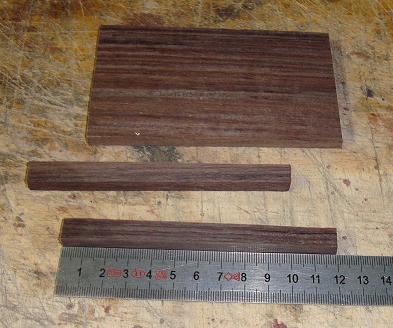
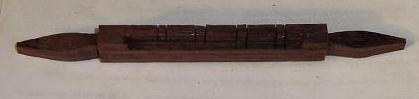
Most classical mandolin bridges are 120mm in length, though
some can be as long as 135mm.
Starting with a large block of ebony or rosewood, either fit the foot while still attached to the larger block, (or cut a bridge blank 120mm about 15mm tall). With a plane or sanding block, make sure the top is flat and level. If you have fitted the foot, work out the height you will need, and cut off the fitted section at that height. |
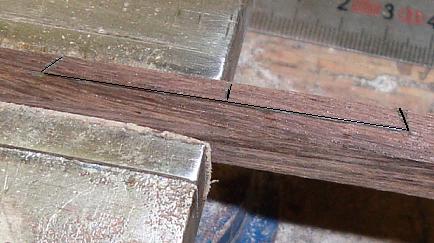
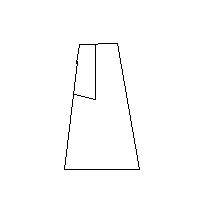
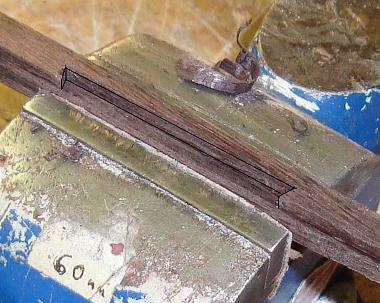
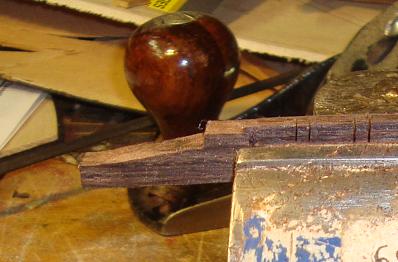
Put the blank in a vice, and mark
the half way point (60mm) Either side of this, mark the ends of the
shelf to be cut, 25mm each side, making sure the cut mark angles back
away from the centre, so that later it will help to hold the saddle well. Then cut
each of the two diagonal lines with a thin saw blade.
The shelf will then be 50mm long, which is sufficient for a typical string spread on a Neapolitan/German mandolin which is usually around 38mm. |
|
|
|
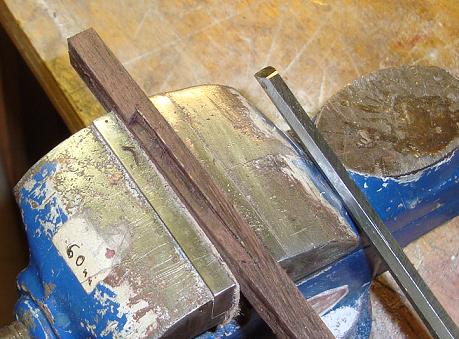
| Cut out the shelf carefully with a small chisel. Take great care at the ends of the shelf, you don't want to damage the diagonal end. Also pay particular attention to the grain; chiselling one way will be easy, while the other direction may see the chisel dig into the grain if it is not completely horizontal. | I tend to favour a 5-6mm chisel which I use on the flat, (as in the photo) not upright, as I find I can control it better. I push with one hand, and brace the chisel with the other, or it is all too easy to cut/slip disastrously into the shelf end. |
|
|
|
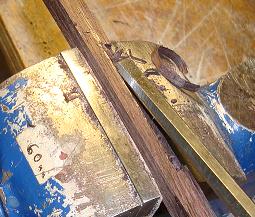
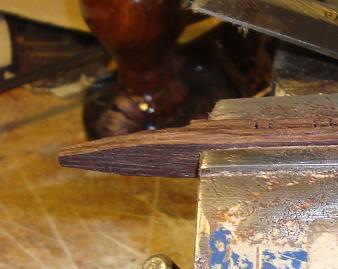
| When the slot is finished, you need to make sure is is clean right into the corners, I use a craft knife/chisel. Also, and bottom of the shelf should be angled inwards, (slightly angled chisel) to help retain the saddle, especially if it is a brass cylinder. | It should look like this when the shelf is cut. Here I have marked out the edges for better visibility. |
|
|
|
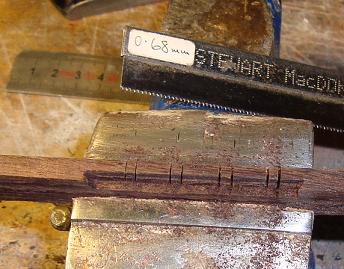
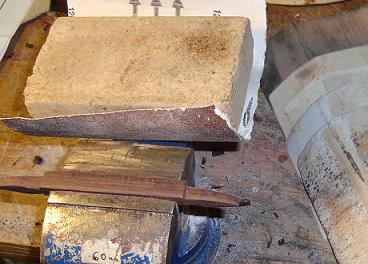
| Once the shelf has successfully been cut, then I add any taper required, by clamping and passing an angled plane over each side. Care must be taken with the shelf side. It is also possible to do this with 80 grade sandpaper, and less risky for a novice. | Next I use the graduated saws to cut the string slots. Gaps are generally 2 - 2.5mm between slots. I cut the left slot first, and then press my thumb onto the string splitter whilst cutting the right hand slot. This helps to stop a careless saw movement breaking the small section. (helps, but doesn't always prevent it) |
|
|
|
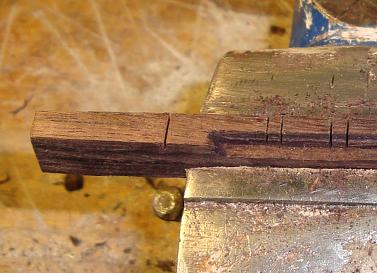
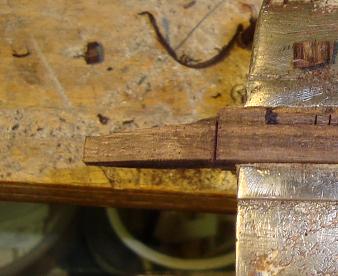
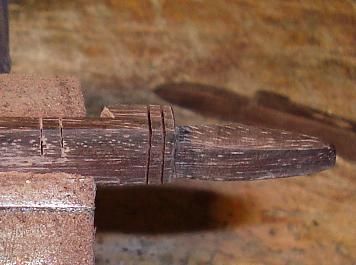
| Next, measure 25mm from each end, and make a saw cut there about 2mm deep. This will be where the wing is formed. | The wing needs to be less substantial than the body of the bridge, so as not to catch the hand, so it is pared down, either with a chisel (20mm used flat) or a saw. |
|
|
|
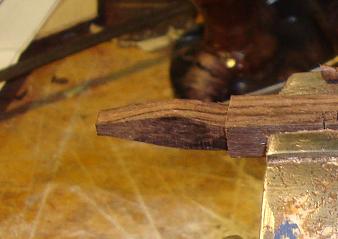
| The bridge is then turned sideways in the vice, and both wings are tapered down, from the centre working outwards, but not quite to points.... this will be done when sanding later. Alternatively, you can sand down with a rotary sander if you have one. Again I use a 20mm chisel flat to pare away from each side. | Cut a 2mm deep slot in each side, 25mm from the end, as with the top. |
|
|
|
| Approaching this time from the end of the bridge, pare away a little wood in towards the new slot. Take care at the end not to cut into the body of the bridge. Again I do this with a flat chisel. | You now have your rough bridge made. |
|
|
|
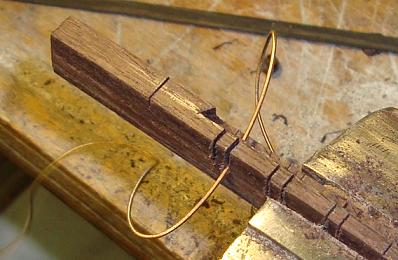
| To open up the slots for the bottom string I use an off cut of the same gauge like a garrotte as the slot file. The graduated saws stop at 0.025", which is not wide enough. | The next step is the polishing, for which I clamp it into the vice, using 80, 120, 240, 320, 600 800 and 1000 grade sandpaper. Do each side and then the top.... take care with the fragile wings. |
|
|
|
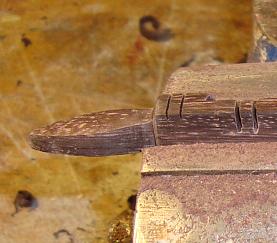
| Just in from both wings, cut one or two slots about 1mm deep. These will be purely for decoration. | Turning the bridge on its side in the vice, continue to cut the slots down each side. There we are, done. |
 2.
2. 3.
3. 4.
4. 5.
5. 6.
6. 7.
7. 8.
8. 9.
9. 10.
10. 11.
11. 12.
12. 13.
13. 14.
14. 15.
15. 16.
16. 17.
17.
 18.
18.