|
Nut Fitting |
|
If you are adjusting a nut after fitting a
new bridge, go to step 6: fine tuning |
|
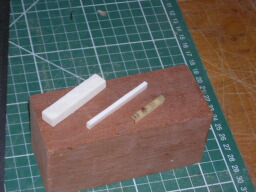
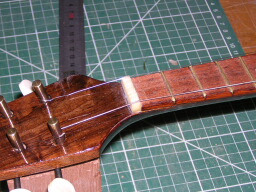
Step 1: You must first choose a hard material for
the nut and cut it to size. Bone is most often used, though there are many
modern resins that are as dense. You will sometimes find nuts of ebony
or rosewood on old instruments.
If you are replacing a nut, cut it the same size as the old
one, but a little taller. For a nut where the original is missing, cut it as wide as the
fingerboard at the head end, tall enough so it is proud of the fingerboard
by about 2-3mm, and about 3-5mm deep, depending on the angle of the
headstock. Here a bone nut is in the process of being cut to the size of
the original. |
 |
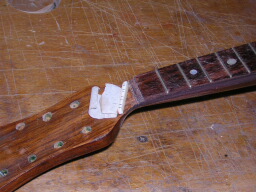
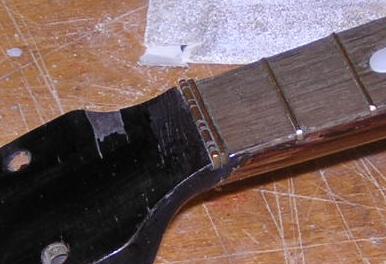
| Step 2: Fit the nut foot carefully to
the nut slot. Finish the nut
off to about 1mm above the fret height. I generally round off the sharp edges
and corners on the top of the nut,
but NOT the side that will receive the strings. Theoretically,
the string height on the nut should be exactly the same height as if they
were sitting on a 0 fret. I generally leave them a shade taller, to allow
for fine tuning. |
 |
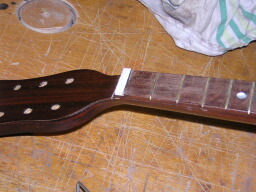
| Step 3: Next the string positions must
be marked out. See the table below for typical spreads on the nut. String
pairs need to be close enough to be able to be played together easily, but
not close enough to touch when vibrating, generally not closer than 2mm.
They need to be as close to the sides as is possible without fingers
slipping off the edge, often as little as 1mm on the light-weight Italian
instruments.
Bear in mind when spacing
the pairs, that 3rd and 4th are wider, so will need a little larger space,
and thus distance between them. Also, the slots for the centre pairs are often angled
outwards, to take the strings 'out' towards the tuners.
|
 |
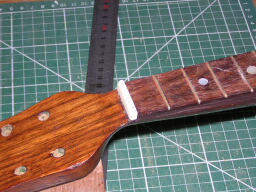
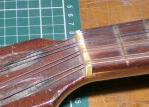
| Step 4: The next step is to start the
string slots. Holding the nut in a vice, use the narrowest, finest saw
blade that you have; cut at an angle, parallel with the face of the head, being careful not to go far into the
front face. Slots can be widened and deepened with a file or old string to fit later.
If you have a 0 fret, then the slots will need to be cut
below the level of the frets, and angled down at the same angle as the
head. If there is no 0 fret, they will need to be cut no deeper
than just above fret height, no more than 1/2 mm, and again angled down
like the head.
Always under-saw, as you can go a little deeper if
necessary...... if you go too far, you cannot undo the cut. |
|
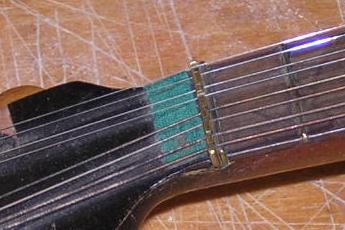
| Step 5: The slots need to be fitted to
the individual string sizes. I tend to use a saw and a needle file to start, and a
piece of old or off-cut string (3rd and 4th) as a file to finish off. The
slot needs to be wide enough to fit the string with no room for vibrations
within the slot. The front edge of the slot should 'stop' the string
cleanly, hence the slots angled down towards the head.
I tend to use an
old E string and an old G string to try the setup on 1st and 4th. Now is a good time to glue in the nut. You must then fit your
strings and gradually tune up. Once in tune you can examine your efforts.
|
 |
| Step 6: Fine tuning. You will probably need to make small adjustments
once the strings are fully tuned. I try to avoid taking
strings off to do this, slackening off enough to pull back a string and
file/saw a slot, then tuning up again to test it. Rattles or buzzes at this
stage are difficult to find, especially if you have also renewed or re-fitted the bridge. I have found a hand lens very useful for spotting
those strings you thought were resting on the 0
fret. Remember, in an easy action, you should only be able to slip a
thick piece of paper under the string at fret one, but not a
piece of thin card. At fret 12, the
string should be between 1.5mm and 2mm above the fret. Higher makes
the action slow and harder to play, lower can result in rattles and
buzzes as the instrument moves in reaction to changes in temperature and
humidity.
|
 |
|
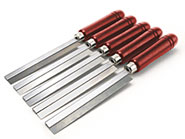
I have found Stew Mac's
graduated saw set extremely useful in cutting bridge and nut slots.
Gauges are 0.008" 0.010" 0.015"
0.020" 0.025" at around 40$
|
 |
 1
1
 4
4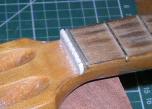 2
2
 5
5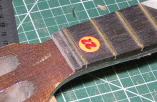 3
3