Hole Repair
Home Hospital Restoration Parts Table Contact
   I have divided this section into two, working with large holes, which are too big to be filled, and small holes, that can be repaired with filler.


Large Holes

In this section, I am defining a hole as a perforation in the top, but which does not have significant length like a crack. As such, it usually has a different cause..... sadly instrument abuse. The approach to repairing large holes is a little more complex and difficult than that for small holes and cracks. Essentially you need to cut around the hole to get good, clean edges, to which you can glue a replacement piece.

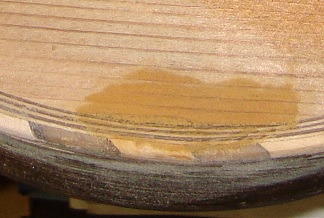
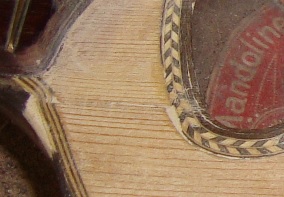
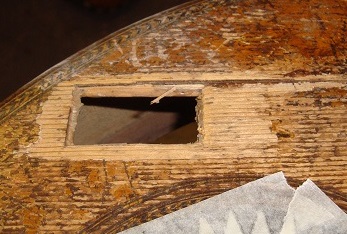
  Here is the problem... a thin piece of wood stuck over the hole, and the associated crack filled with glue/wax or similar.

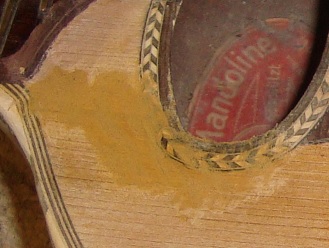
  The hole shows evidence of being cut back previously, I can't imagine it was made that shape, but the repair was very much a mess.

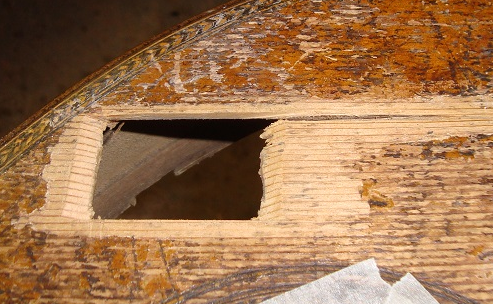
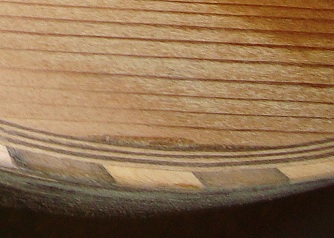
  The first job is was to remove the patch, and clean out the old glue and wax...   visible here is also the sloped edges top and bottom, which will give a much bigger gluing surface.

  Before anything else however, it was necessary to fill the associated crack with a sliver of wood... preferable to taking out more topwood.
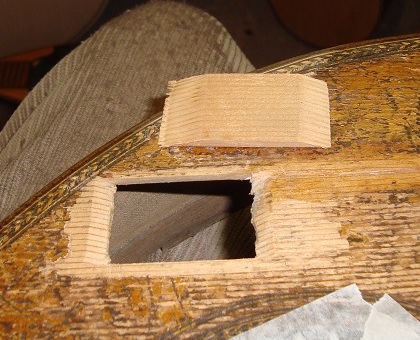
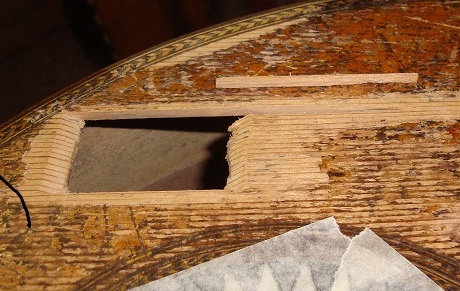
  This is the piece i have prepared to fill the hole, very carefully measured, a little large, and then carefully sanded each side to fit. The two ends are filed down to match the sloping ends of the hole...   
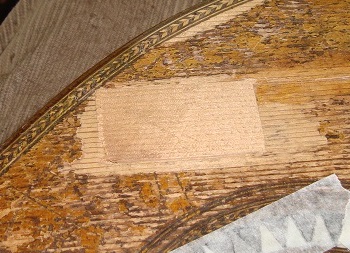
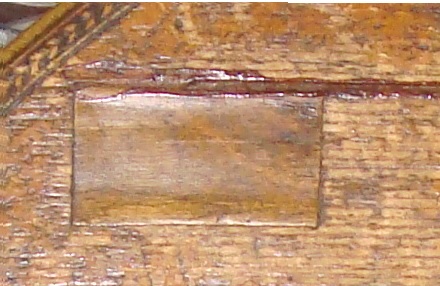
This is the fit before gluing, as far as possible, I selected a piece of wood with similar grain spacing, though it is impossible to get to match completely, and I have the advantage of a good selection of wood to choose from.
     once the top is sanded, its possible to identify any small cracks that need treating as     


Small Holes

For small holes, its is often simpler, and less invasive, to fill them with some sort of mastic. The best medium for this I have found, is a powdered Wood Mastic P340 (though it can be bought in a ready to use tube) produced by BRIANCON in France, and comes in 4 flavours..... each a little darker. I buy from Cremona Tools in Italy.

   Left the hole is visible at the edge of the sound-hole purfling. Another is visible right in the second photo.... these holes are the result of shrinkage, and very tricky to fill with slivers of wood because of their shape... but the same process is applicable for holes that are the result of abuse...
   The mastic comes in 4 colours, light, blond, dark and exotic, each successively darker. It is necessary to use a little of the finish to be used on the wood first, as the wood will darken once it is applied. In this case the colour will most resemble 'chiaro'.   O    The tins contain gms..... which will last you for years!!
  I mix using a small quantity of powder in a bottle top, you dont need too much, and I add water with a dropper. Mix it up to the consistency of toothpaste. It can be applied with a small piece of wood or small knife.....
   Once applied, work well into the cracks/holes, and leave the surface standing a little proud. It will sand down when dry to the level of the wood. It will also dry a little paler than when applied, but will darken again with the application of finish.
   Here it is sanded down, it seems obvious now, but will be much less so once the finish is applied. Right is the same section after the varnish was applied.... photo