|
Method 2 |
|
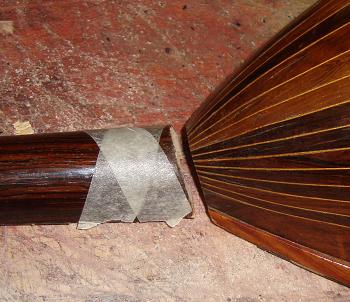
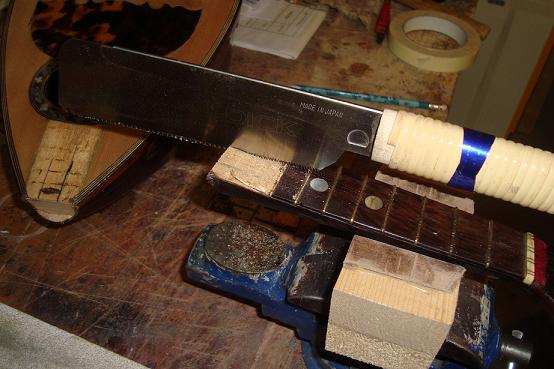
| The second method for resetting the neck can be used where the mandolin is still sound, structurally, apart from the bend at fret 10..... and this seems to happen annoyingly often! This is not for the feint-hearted however, as it involves strapping the mandolin down and sawing the neck off it!!! Use as a last resort. | |
|
|
|
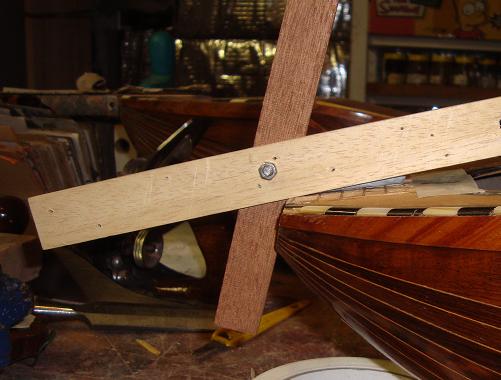
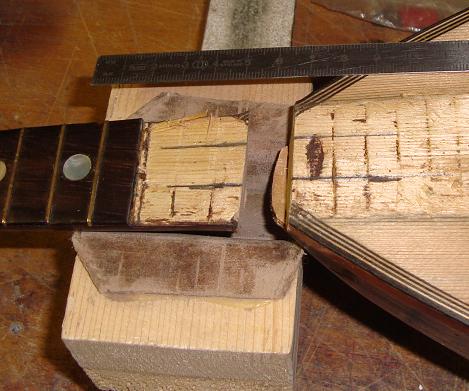
| The easiest way I have found to do this is to camp down the neck, leaving the bowl extended over the end of the workbench. This way you don't get the cant interfering. You need to saw down at an angle that just touches the ends of the bowl ribs, so that you have one clean cut. If the f-b is still in place, 3 frets either side of the cut will new need to be removed to accommodate a rebate cut into the neck and heel. | After cutting the neck, you need to work out how much to sand off the neck to obtain the correct reset angle. For this you need 2 straight-edged lengths of wood joined with a nut and butterfly, that can be tightened. Fit one piece to the cut heel end, and move the second until the right hand end gives you a good bridge height at the cant.. (5-10mm)... then tighten the butterfly. Remember to allow a couple of mm for the depth of the f-b, if it is not present! |
|
|
|
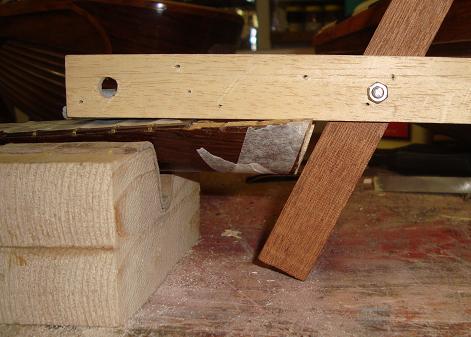
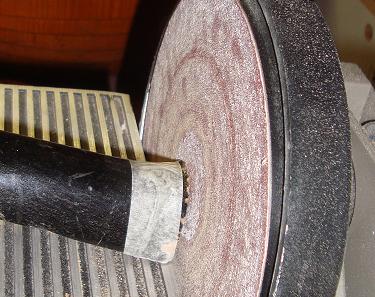
| The next step is to match up the neck-end with the other side of the vertical wood.... keep the horizontal on the neck, and there should be a gap visible between the neck-end and the vertical. It will be triangular. You will need to remove wood from the lower part of the neck, but leave the top part untouched. I this way, as if looking from the side of the mandolin, the head will be dropped a little. | I have found a disc sander works best when sanding the neck end, doing it by hand is extremely difficult, the neck is very hard to hold, and the end invariably ends up rounded.... Mark up with masking tape, parallel to the vertical marker wood, and sand gradually down to that... offering up frequently to see how the angle is changing. |
|
|
|
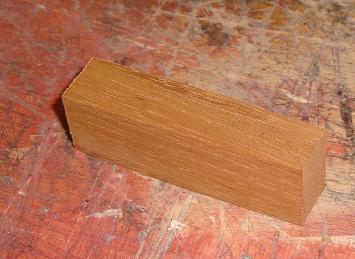
| Once a good angle is established, you need to cut and plane a short block of wood, about half the width and two thirds the depth of the neck... nicely squared, about 6 frets long. This will rejoin the neck to the heel. | Make sure you have a good centre line marked on both neck and insert.... this will be used to line everything up. Mark out the shape of the insert on the neck, and use a saw and chisel to remove the wood from the rebate, neck first. |
|
|
|
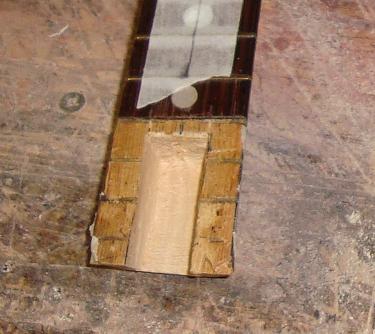
| Use a saw to cut down the sides or the rebate first, sawing diagonally, until the correct positions on the top (about 3 frets) and at the end (about 2/3 of the way down the neck) are reached. The wood between the cuts can then be removed with a chisel. | Here the rebate has been chiselled out. Make sure to clean up the sides and the back, particularly, of the rebate, as a good close fit with the insert is important for strength. |
|
photo |
photo |
| Next glue the insert into the neck alone. It does not need to levelled off at this point... once glued, the bottom of it will then be used to inform the depth of the rebate made in the heel. | The next step is to cut the rebate in the heel. As the neck has been tilted slightly back, the angle of the bottom of the rebate is critical as it will be slightly tilted. After sawing, cut down the rebate gradually, offering up the neck frequently, to see how much further you must chisel. The neck/heel surfaces and the insert base should make good contact. A small space either side of the rebate may be useful in aligning the neck.... |
|
photo |
photo |
| You know when the correct depth is reached, when the neck is level with the table. Before gluing the neck you must check the alignment of the neck. After taping in the neck, use a thread along the centre line to check lateral alignment. | The final check is to look at the tilt of the fingerboard. It should normally be in the same plane as the top, but can easily get tilted left or right. If this happens, the relevant side of the heel rebate base needs to be chiselled a little lower. |
| photo | photo |
| There is likely to be a small gap either side of the insert when you glue it into the heel rebate. These will enable you to make lateral adjustments, and once the correct position of the neck is achieved, can be filled in with small fillets of wood, which I usually tap in with a hammer. | Once everything is checked and adjusted, the neck can be glued in. This is the system I use to achieve this..... Knife test |
 |
|
| When the clamps are removed, the neck should be solid, and the top of the insert can finally be chiselled level with the f-b and table. There will be a dip because you have tilted the neck back, so a small shim will need to be installed on the table to create a level surface upon which to re-install the f-b. | Here I have installed the shim, which will be first chiselled roughly level, and a good flat surface achieved with heavy duty sandpaper. |